")
")
The paint pens are rubbish, they are all dried up, nothing comes out the tip, they are streaky etc etc Yes we hear it all the time. And 99% of the time we have helped people resolve their pen issues.
Just a heads up it is usually not the paint pens but the way you are using them and not understanding them. Wow that’s something noone ever wants to hear – blame the way the pens are used not the pens! But read on we have some hints and tips that will help you get in the flow. The painting is the easy part once you understand your pen.
Lets chat Paint Pens on rocks

")
")
")
")
")
")
")
1. PEEL the plastic off your pen, there is a reason why!
Many people twist the plastic off and that action can loosen the pen barrel off from the tip area with the lid.
If you twist them apart slightly then they can separate when shaking and that means paint – EVERYWHERE
You cannot know that manufacturers have tightly screwed the pen together.
2. SHAKE and we’re saying shake like you never have before hahaha.
This will be the best exercise you have had this week for upper arm strength. Each pen needs a few minutes each – brand dependent. There is no such thing as over shaking. You should be hearing the sound of the metal ball inside.
The content of the pen is acrylic paint which is a variety of binders and pigments these need to be combined. When the contents are combined only then will they perform as they were intended to.
3. BURP just like a newborn baby your pens need to be burped every now and then.
Hold the pen tip side up and press the tip in a few times, this releases any air and pressure built up in the barrel.
It is always good to do this when they are new as well as after you have travelled with them. I travel with mine on a plane and always burp them before I use them again. A friend has a cabin high in the mountains and has to do the same . Altitude is one thing that can create a pressure build up in the pen. This helps avoid a huge puddle of paint leaking out.
4.PRIME the pen to start getting the paint to flow. Gently pushing up and down on the nib/tip this releases a valve in the barrel. When the nib is pushed in towards the barrel this releases the paint flow to saturate the nib.
Pressing the nib in for too long at once will cause an overload of paint to puddle out. To get best results it is better to gently push up and down. You will see the paint start to flow slowing down the tip, keep going until it is all saturated in paint.
DID YOU KNOW
Mitsubishi Pencil ( The manufacturers of Posca Pens) have developed a unique valve mechanism that guarantees a perfect seal for the marker and conserves the paint over time. The same mechanism is used to prime the POSCA for use and to re-saturate the tip as often as necessary during creation.
GRAB SOME POSCA PENS HERE
Click here – Australia
Click here – USA & other countries
")
")
5. TEST the flow of your pen – but NOT on your masterpiece. Grab a test rock and squiggle your pen a few times to test the flow.
6. CAP your pen after you have finished colouring the area you are working on. DO not leave them uncapped on the work bench for too long as you do not want paint drying on the tip.
")
")
Three brands that we recommend after much testing are
Posca Acrylic Paint Pens –
Click here – Australia
Click here – USA & other countries
Tooli-Art Acrylic Paint Pens –
Click here – Australia
Click Here – USA & other countries
Artistro – Acrylic Paint Pens –
Click here – Australia
Click Here – USA & other countries
")
")
How should you store your paint Pens? This is something you are going to get many different opinions on. Some Paint Pen companies say upright some say horizontal. We store our paint Pens horizontal (sideways) WHY?
It was logic that the decision was made, and here are a few of the reasons we stacked up to decide on the paint pens being stored horizontal. You may like pen bags to store your pens – AVAILABLE HERE
Click here – Australia
Click Here – USA & other countries
")
")
Pigment is heavier than the binder. When the pen is left unused over time pigment sinks to the bottom of the pen barrel, the metal ball bearing with it.
When left upright the pigment and ball sit in the small base area of the pen, if it gets stuck, it is harder to get the ball and pigment fully mixed back in – Sometimes a whack on a table top is needed to budge it and extra shaking. If the pens are stored sideways the pigment still settles but across the larger area across the pen. The greater area gives more space for the pigment and ball to move and much easier when you have to re-combine the mixture.
")
")
Do you enjoy a bit of DIY?
To try our tutorial on how to make your own pen storage solution that is perfect to sit on your desktop.
")
")
When your pen nibs/tips dry out it can seem like the paint has finished as no paint flows out. Rehydrating and cleaning the nib usually fixes that problem …. unless the paint inside the barrel is actually used up – but that is usually a heap of rocks (100’s) that you have coloured before that happens. A ‘Water Dip’ is a quick fix to do as you are painting to stop your pens drying out. Keep a small cup of clean water by your side. Dip the tip in and out of the water and give a scribble on a test rock to get the flow restored. Water is compatible with your acrylic paint pens – keeps the tips clean & hydrated. I like to use
MINI Shot Glasses – Like the ones here
Click here – Australia
USA & other countries
Keep the lids securely on your pen. Make sure you always cap your pens when not in use, this helps slow the timing of the tip/nib drying. The pen valve protects the paint in the barrel from drying up but nothing stops the tip from drying up when not used for a while.
When you do not use your pens for a while the tip will dry with a touch of acrylic paint in the tip. The trick is to clean that off and rehydrate the pen. Follow the steps below for how to fully hydrate and clean your tips.
Another reason for getting a dry tip is the way you use the pen . Many people like to get the finished look in the beginning and they paint too thick too fast. The pait is starting to dry as they are still moving paint. Just paint nice thin layers like we teach you – HERE
Posca Acrylic Paint Pens –
Click here – Australia
Click here – USA & other countries
Tooli-Art Acrylic Paint Pens –
Click here – Australia
Click Here – USA & other countries
Artistro – Acrylic Paint Pens –
Click here – Australia
Click Here – USA & other countries
")
")
")
")
1. Pull the nib out of the pen and place it in some room temperature tap water to soak. Heat sets paint so do not used heated up water. Paint pens are acrylic paint so you only need to use water. You do not need a chemical build up in the nib, it takes away from the purity of the paint coming through.
2. After soaking, wipe any gunk off the nib. Most of it should of come off in the water. You are not trying to dry the nib, just getting any old paint gunk off. Replace the nib back in the pen. You can use tweezers if you do not wish to hold the tip in your bare hands.
3. You now want to reset your pen, we showed you this above, it is the same method that you use on a brand new pen.
1. Shake
2. Burp
3. Prime
4. Test
5. Cap when not in use
")
")
If you have multiple tips to clean and hydrate at the same time – use an ice cube tray. Place one tip in each section and cover with water. You can find ice cube trays HERE

WHICH Paint Pens to buy ?

WHICH Paint Pens to buy … We have used so many paint pens on rocks and have developed a great understanding about what works. We heavily test many pens and want to share our favourite outcomes. Please understand that there are other great Paint Pens but we have narrowed it down to the ones that work best on rocks without having too much stress with their use and sealing. We do mention pens in this link that are not suitable for use on rocks and we share – WHY
CLICK HERE
")
SHOP HERE for the great products that we use on rocks. We have tested them over 30 day testing – from use to leaving outside in rain & sun.
If you need help with any of these products create a post on our Facebook group and we can help you troubleshoot. JOIN US HERE
")
")


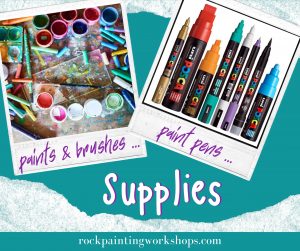
Our Supplies page is HERE to read up on everything you need to paint Rocks.
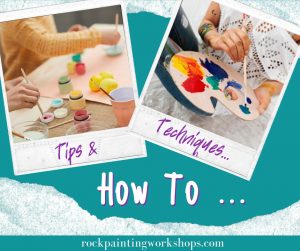
Learn heaps of different techniques on how to paint rocks – Right HERE
We are adding new tutorials all the time CLICK HERE for heaps of new ideas